For many living in rentals, the rule for 'no wallpaper' is quite apparent. For others, they don't like the look of it. And for some, they have an aversion for it because it tends to date itself quickly, colors may fade if on a wall facing direct sunlight, it can get expensive-fast, and lets face it, it's not a 10 minute put up/take down project! But wallpaper creates color, texture, and pattern on a wall that may otherwise end up white and forgotten. So if you're wishing for that look, but minus the wallpaper-whats a girl (
or guy!) to do? One word. Cluster.
1. Wall Gallery: Hello .25 cent frames from your favorite thrift store! Grab any shape or size or color you like and color accordingly! Coordinate them by painting them all the same color, or leave them au-naturale for a funky eclectic look! Fill with anything! Wallpaper, paint chips, kids paintings, family pictures, maps, postcards, handkerchiefs, fabric, scrapbook paper-oh my, the possibilities are endless!
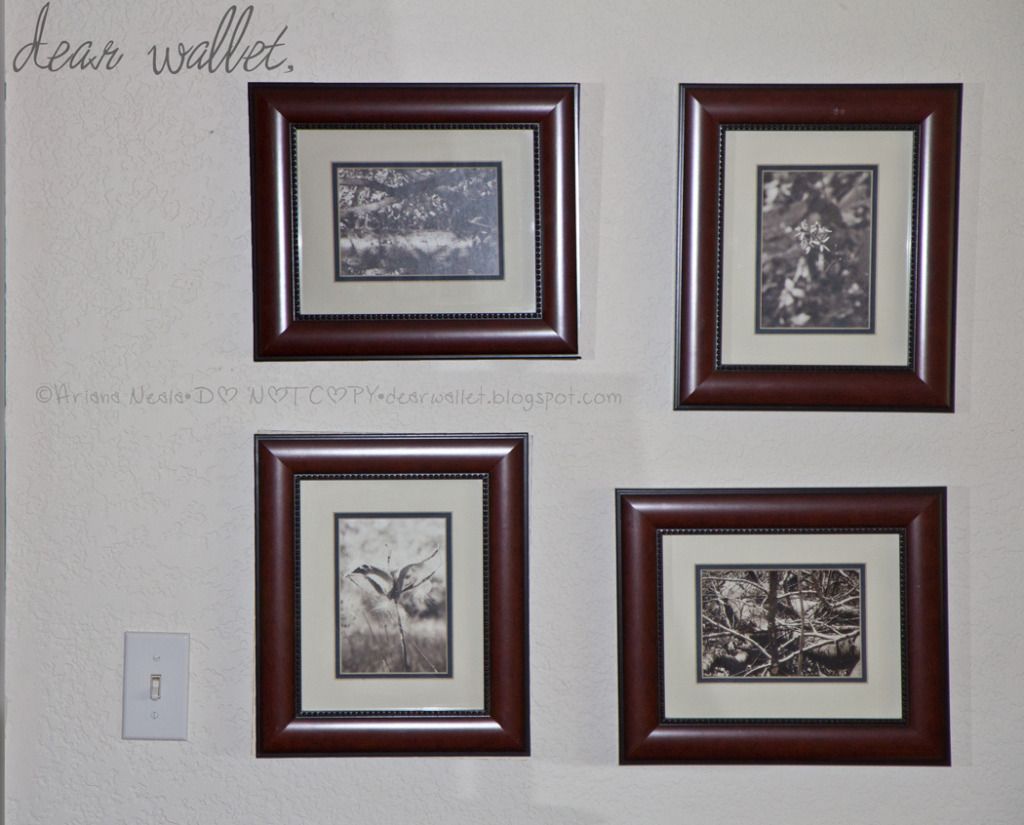 |
| Small cluster hanging in a very small area in the hallway. (Photographs by my mother, not me!) |
2. Clustered Artwork: scout out your local thrift stores, school art fairs (support a student artist!), and garage sales for artwork that catches your eye. Collect in themes; by color, style, medium, subject, or go crazy and grab anything that creates emotion! Cluster along the wall, place an item anywhere it will fit and you will never miss color or texture in that room again!
3. Dishes: Mismatched (or matching!) plates are sure to give a elegant and colorful pop to any room. Treat them in clusters, or create shapes to make it fun! Add in silverware for an unexpected pop of shine and texture! Don't like dishes? Find a favorite object, collect and hang!
 |
| Star cluster hanging in the entry way outside. |
4. Bunting: These adorable little flag garlands have a fantastic way of bringing out personality in a room. Whether you're look is more rustic with burlap, girly with floral fabric, natural with wood cutouts, patriotic with country flags, or 'green' with recycled items; bunting is the perfect way to add texture and color to your room without overloading. Plus they are small and light making them easy to tape on the wall if you can't nail, and even easier to change out with the season! Try layering them for extra depth!
5. Canvas: Canvases are the ideal wall hangings, they are light and easy to hang or move, and they come built in with texture! Add a splash of color with paint (and paint over that when you get bored), find some cheap artwork to hang from the store, cover with fabric, or collage paper on it! The 3D nature of canvases turn any simple project into a professional looking one! Hang your canvas as one super large one, or in a clutter to fill up the wall!
6. Mirrors: Mirrors make rooms larger, which is perfect for a small cramped apartment! Collect your favorites from thrift stores in varying colors and sizes and shapes and create a beautiful cluster on the wall. The shapes will create movement and texture, the color will add pops where you need it in the room, and the mirrors will make the room bigger. Did I mention beautiful?
7. Tapestries/Quilts: Quilts and tapestries are simply textile artwork. So much time, energy, effort and love goes into these pieces and they do not deserve to sit unused. However I understand the safety concern with using thrifted quilts, but try them on the wall instead! (After its been cleaned!) They act as a gorgeous original piece of artwork, full of texture, color and whimsy! There is a quilt design for anyone out there, no matter how country, traditional, or contemporary you are!
8. Light: I know, I know, lights is totally original right? Well then create an unusual spin on them! Use rope lights to spell out your favorite words (LOVE or FAITH anyone?), place christmas lights behind canvases to get beautiful atmospheric light-go a step farther and cut holes into the canvas and stick the lights through them (remember lightbright?)!
9. Chalkboard: Chalkboard has to be my favorite texture of anything. If people would let me, I would probably paint everything with chalkboard paint. Furniture, walls, lamps. Yup. Try it for yourself! Paint an entire wall with chalkboard paint, then you can change out the 'word' (LOVE/FAITH etc) every season, or when you get bored! Want something less bold? Paint a canvas or frame!
10. Flowers: Flowers are the perfect way to brighten up any room, whether they are real or fake they have color and texture like nothing else! Try them in bouquets, by putting vases on the walls, or attaching to frames! Or create beautiful garlands that stretch across the room. Create clusters inside of frames and change out with the season or when you change the color scheme!
You inspired yet? Make sure you follow me on Pinterest to keep up with other great ideas!
Which of these ideas have you done, or are you going to try next? What other ideas do you have for creating color, texture and depth in a room without wallpaper?