•This may be posted to any of the link parties•
Tuesday, November 20, 2012
INSPIRATION [turquoise & gold]
•This may be posted to any of the link parties•
Tuesday, September 4, 2012
INSPIRATION vases
BLUE VASE ($180): First off find a fabulous vase you love. You can get them cheap at thrift stores, or even at the dollar stores! Find a shape you like or see potential in! Then spray paint! Choose your favorite color and go for it. Personally, I don't like the idea of paint being inside the vase, so I would turn it over and spray that way and let it dry. Then head to your local craft store and find some great appliques! They come in wood, foam and more! Find your favorite and stick on! You can even paint over them before you stick them on, or after using watered down paint on a cotton ball for a distressed look!
Tuesday, August 28, 2012
INSPIRATION shells
•This may be posted to any of the link parties•
Friday, August 24, 2012
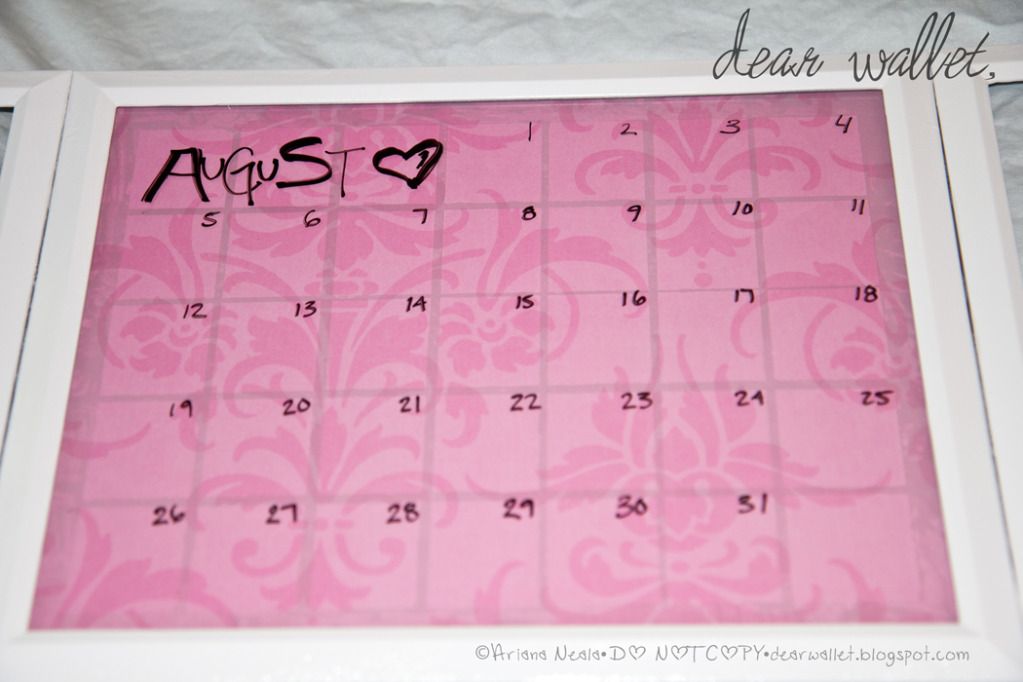
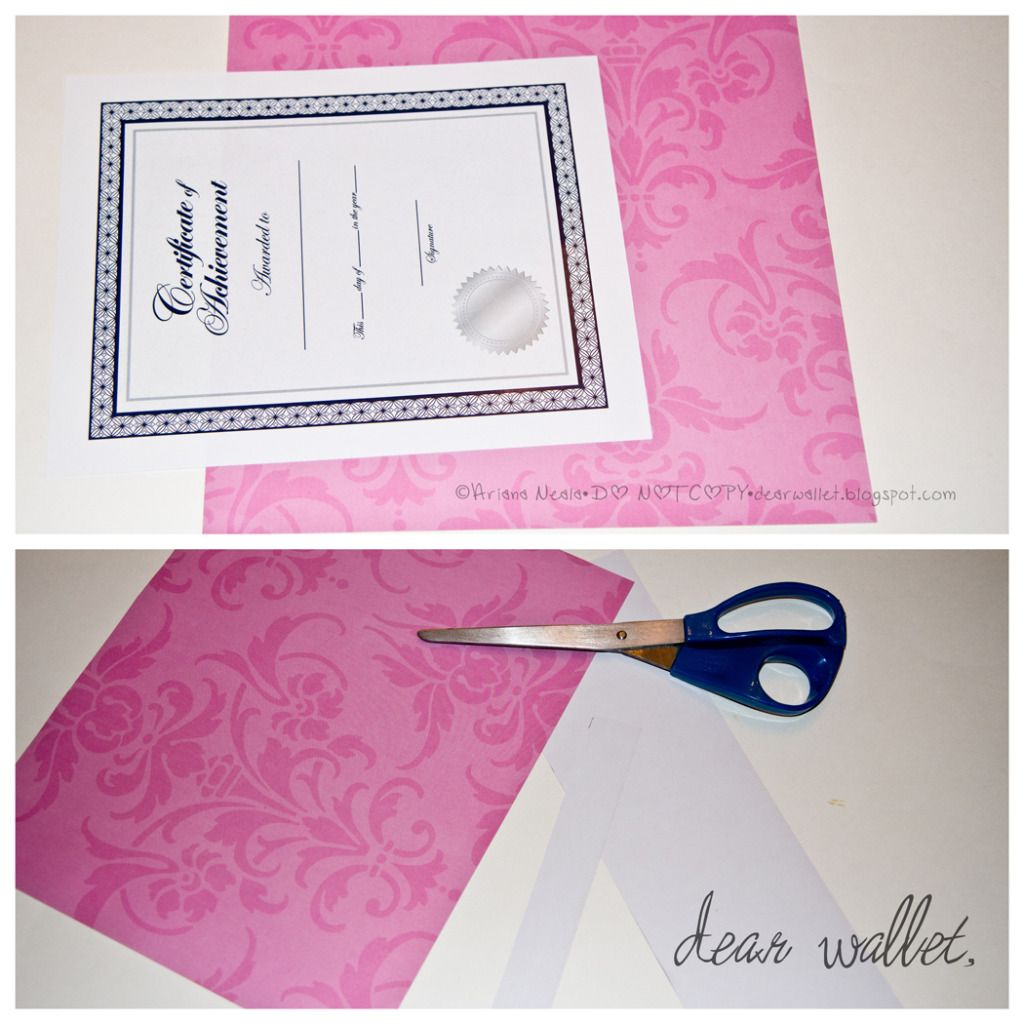
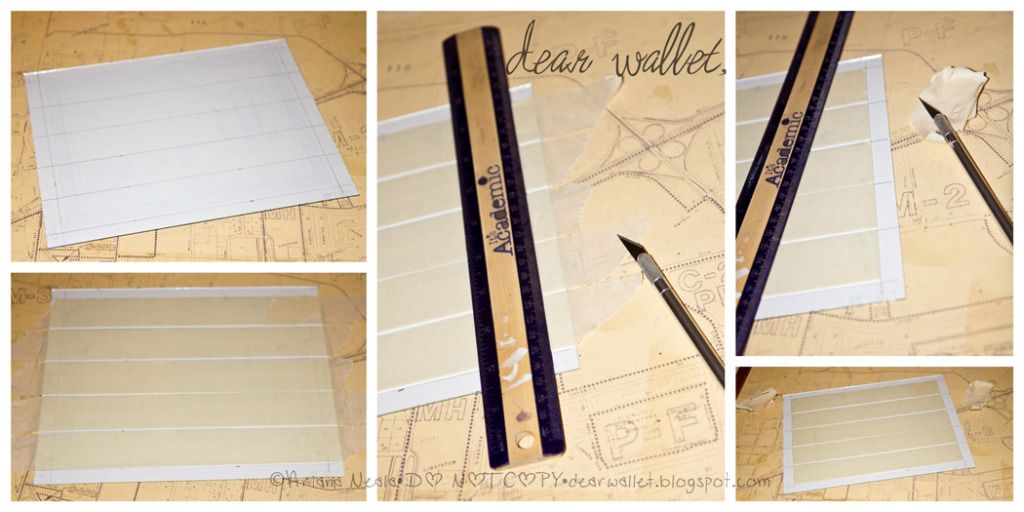
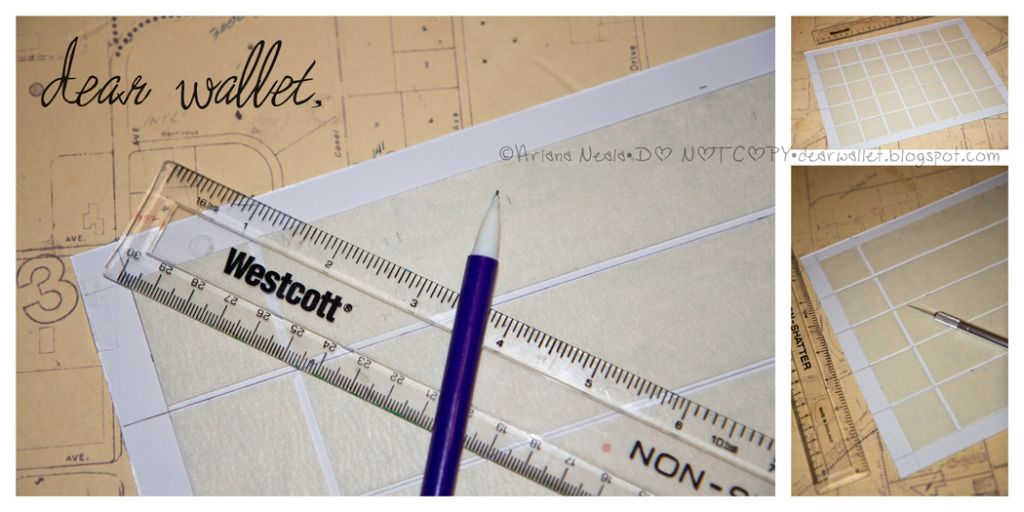
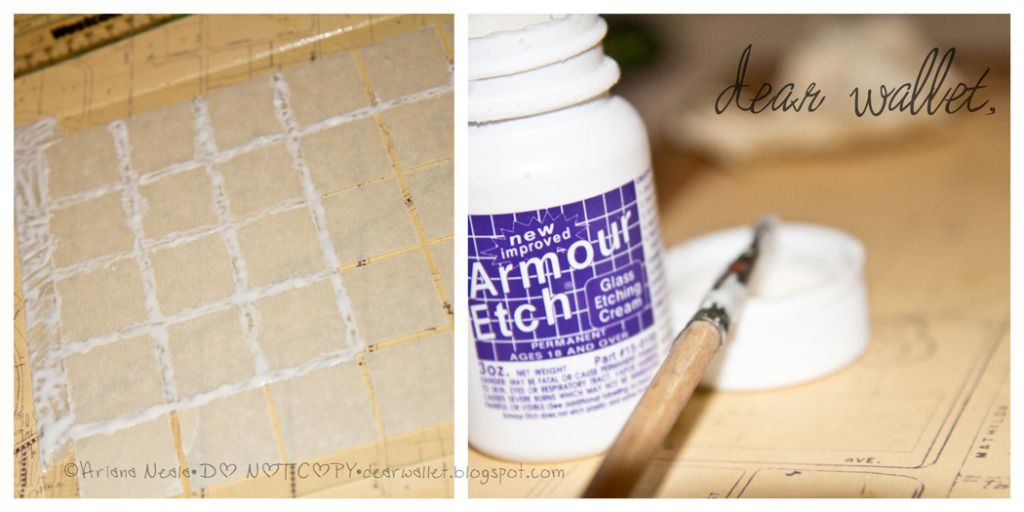
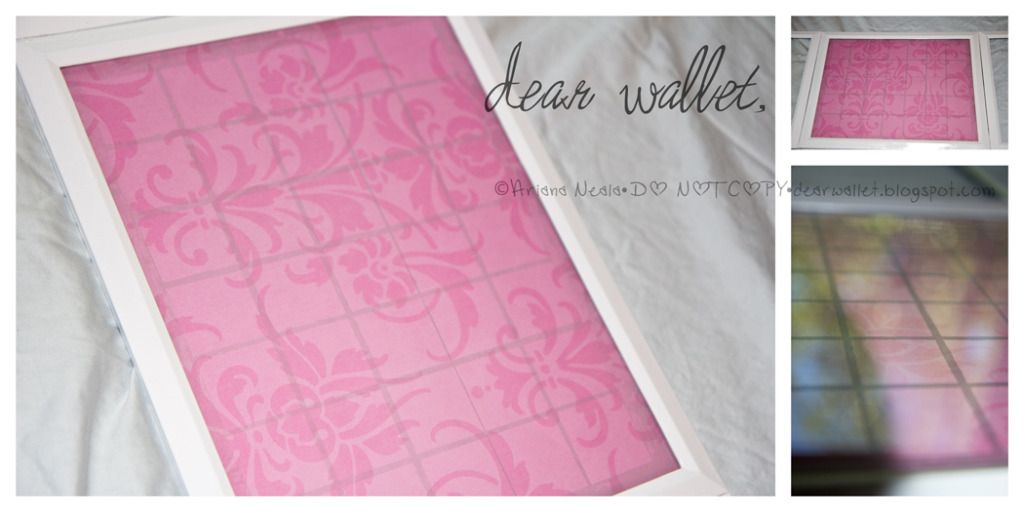
DIY PROJECT: Memo Board Part One: The Calendar
Tuesday, August 14, 2012
INSPIRATION [wild in white]
•This may be posted to any of the link parties•
Tuesday, August 7, 2012
INSPIRATION [shiny]
MIRROR: The great part about this project is not only how customizable it is to your personality, but how cheap it can be to create as well! Find something sturdy for your backing, this will depend entirely on what size your mirror is. You can find them in any size (and shape) at your local thrift store, and even some home improvement stores. A small circle can be found in your local dollar store as well. For a small one you can use foam board, stiff cardboard, and a larger heavier one use wood. Make sure your backing is bigger than the mirror (how big is up to you) find rhinestones, or mirrored pieces at your local craft store, and apply to the backing, around the mirror using tacky glue, or glass epoxy!
CANDLEHOLDER: This candle holder is so cute, so classy, and so cheap to make! Head to your dollar store, find a small circle mirror, and pick up a bag of rhinestones while you're there! Use your hot glue gun to attach around the mirror and add instant pizzaz!
JEWELRY BOX: Find a wooden box, and use the Look Glass Mirror-Like spray paint to create the look. Adorn the top with rhinestones using hot glue-and whola!
FRAME: A cheap boring frame can be instant glam-a-fied by using varying sizes and shapes of rhinestones. Use larger ones to create a unique shape in the corner, and use smaller ones to grow out away from it, filling up the rest of the frame space. If your pieces are large and are over 50% off the frame surface, use a piece of cardboard to make it sturdy from the back. I suggest using modpodge to apply the pieces into place!
Have you tried one of these projects or techniques? I'd love to see it! Send me a link or picture so I can feature it on my blog!
•This may be posted to any of the link parties•
Thursday, July 19, 2012
GUEST SERVICES ombre
Totally ingenious! Totally cute! Totally cheap and easy! (why aren't you making one RIGHT NOW?!)
Talk about simple, I'm not a fan of the tie-dye look, so this is perfect- I get to play but get a look I love! I might need this in every color!

I've been eyeballing these curtains since their grand debut on Remodelaholic, I'm in love with them! This tutorial is perfect with great pictures too! (make sure you check out both sites)!

I can't get over how creative people are, and this is no exception! I'm not going to lie...I put pistachio's on my grocery list after I saw this!
Wednesday, July 18, 2012
DIY PROJECT: Vintage Camera Bank
•Shared on link parties Tuesday-Monday!•
Tuesday, July 17, 2012
INSPIRATION [patriotic shoes]
Monday, July 9, 2012
INSPIRATION [patriotic decor]
Patriotism isn't something that should be celebrated one day a year, it should be every day, something American's should be proudly living and breathing. Yes there are opposing political parties, and they don't always get along. Yes there will always be things in our government we don't agree with. But that's the amazing thing about democracy, we have the right to disagree, the right to fight. Whether we agree or disagree with what our current affairs are, it is our American right. Stepping off of my soapbox, I've found a few ways to bring patriotism back into the home in small ways, ways that may not prove to the world we are proud of our country, but instead offer a simple reminder everyday of who we are and what we are fighting for.
PIGGY BANK: This piggy bank was way too much fun to pass up. A quick way to reinvent your boring childhood piggy bank into something sparkly, fun, and alllllll american! Simply using any paint or nailpolish on hand, paint the basic areas of the bank the preferred color, and bedazzle using scrapbook rhinestones, or cheap bulk rhinestones with a dab of hot glue! Instant beautification!
FRAME: This frame is such a great reminder of who we are, place a family heirloom photo in it, or update with your most recent family photo for a strong reminder every what you have to be thankful for! Using painters tape, tape off the areas, and using any paint on hand, or nail polish color accordingly! Use rhinestone stars to pretty it up, or place stickers on it before painting, and peel off when it dries to leave the shape!
PILLOW: Comfortable and cozy! Find a cheap plain pillow, use tape to create the sections and star stickers for the stars, and dab fabric paint in the areas. When it dries, pull it off, heat seal and wash!
Have another idea, or tried one of these? Send me a link or picture! I'd love to feature it!
•Posted to link parties Thursday, Friday, Saturday, Sunday & Monday!•
To find out information about the products used, please click the image to head to Polyvore!
Thursday, July 5, 2012
DIY Project: Wicker Hanging Lantern
(3) wicker wreaths-preferably in differing sizes, she picked out great looking ones and set on top of each other to find ones that slightly varied in size.
1 package of floral wire-she ended up having some on hand, but got a package anyway!
1 votive candle holder-she had lots of these too, but couldn't resist the great pattern on the side of this! Make sure whatever you use has a lip on it!
Dollar Tree total: $5 (or $3 if you stick with materials on hand!)
She had raffia wrapped wire on hand, which can be expensive, jute, hemp, string, ribbon etc-whatever you have on hand and matches your style will work!
Wire cutters
Tea light-most people have hundreds of these lying around, but if you don't Dollar Tree stocks these as well!
'S' hook
2) Next, using the floral wire, "sew" the wire through the dome, weaving through them to ensure they stay together. You could repeat on the bottom to keep it sturdy. If you don't have floral wire, you could use hot glue, super glue or even wire bag ties from the grocery store! Once you've 'sewn' them together, tuck the wire back into the wreaths so they aren't noticeable.
3) For the light, take your votive/candle holder/mason jar etc and use the floral wire or ribbon to wrap around the top (under the lip!). Tie in a knot, with excess wire on one side, pull the excess wire over the jar opening to the exact opposite side, and tie in another knot to create a handle over the jar opening. *NOTE: ribbon can burn! If you use ribbon make sure the jar you use is tall enough to keep the flame away from it, and never leave the candle burning unattended!**
4) Finally, cut an extra long piece of whatever you're using to hang it (here we used raffia wire), choose a top to the light, wrap around the wreaths as shown, allow a loop within the sphere to attach the light onto, tying securely. Attach the other end of the wire to an 'S' hook.
5) Drop your tea light within the jar, light using a long match or lighter, and hang anywhere!
What I learned:
The only necessary item for this to purchase are the wreaths. Usually anything else you need you can find at home!
Never leave the candle burning alone, these are flammable items, and even though a tea light doesn't give off much heat-there is still a chance!
Wire is much safer than ribbon for this project (in and around the candle), for safety sake buy the floral wire, or another type to use! However, ribbon and rope is perfect for hanging up!
These will look great hanging in a garden in bulk, or around a patio for those beautiful summer nights!
•This project is posted to link parties everyday!•
Sunday, July 1, 2012
DIY Project: Ring Display
I heard about the Dollar Tree $5 Challenge from another blog, and was so excited! Partly because I've been itching to craft lately, and have been so uninspired to do so. And partly because I always thought it would be cool to do a project entirely from one store (insert Project Runway addiction). I was so excited, that I ran out to my closest Dollar Tree immediately after reading the rules. Unfortunately I not only came up empty handed, but uninspired as well. Thankfully the boyfriend came up with an idea to check out The Other Dollar Tree the next day. A much larger, much better stocked, and much more inspiring store 30 minutes away. So I went home and scoped out the Dollar Store Crafts site and was shocked and amazed at all the goodies I saw on there. Determined to not only come up with something cute and easy, but functional as well: something that I could use every day I restarted my search the next day. That's when I saw the zen garden and inspiration (finally) struck! A ring display! My rings have found themselves all over my room and bathroom, in various 'trees', jewelry boxes, and plate displays. I needed something large enough to hold all of them, but easy to get them out, and see at the same time. A ring display would be perfect. My mind started going, and after a carrying around $20 worth of goodies, I narrowed it down to four. A set of (3) washcloths in super soft and pretty green microfiber, a plastic frame, a pack of pencils, and a ball of twine. $4. And I got to work. Joining me was a hot glue gun, scissors, and wire cutters (optional)-all on hand. [note that the zen garden didn't make it home with me..]
1. Remove the glass and mat from the frame. I chose a 5x7 because it was a decent enough size to fit a lot on, without being too huge for my dresser. I also chose a frame that had a thicker inset so the ring rolls wouldn't push out past it too far. The first step was to wind the string around the frame, there are many ways to do this, you can glue the front and wrap it messy, or pile it on at random, or layer it neatly as I did by simply holding it tight and wrapping it patiently and gluing occasionally in the back of the frame. I did the sides first, leaving the corners to last. When I got to them I simply wrapped the string left to right slowly covering the corner and creating a neat layering pattern (see pictures). My boyfriend liked it better with black showing through, so really you can wrap it however you prefer it!
2. Next I glued the back of the frame (the part that hangs/easel) to frame. This created a tray basically to glue my rolls onto. I glued the top and bottom first, and the sides after I finished. No real reason other than I forgot. After this I chopped the pencils in half using the wire cutters. You can use anything to cut them, you can even go hulk and break them in your hands. Doesn't have to be perfect, it just creates a stronger roll and gives you something to roll the fabric onto.
3. I took the first washcloth and folded it in half, this way it was just slightly longer/wider than the hole it was going to fit into in the frame. I placed a layer of glue onto the pencil, placed at the edge of the washcloth and started rolling. I only rolled about 1.5 times, gluing at the end. I cut the roll away from the rest of the washcloth, gluing the inner layer to ensure it stays in place. Not entirely necessary but makes it slightly easier to work with.
4. As you can see in the picture below, I basically folded the ends in to place in the frame, and rolled it into position at the edge of it so that the folds went under neath the roll. I glued as close to the bottom of the frame as I could to keep in place on both sides of the roll.
5. Continue steps 3 and 4 until you get to the bottom of the frame. My rolls were about 1.5 cm each. I used 2 washcloths exactly, and 5 pencils to create 10 rolls total. Make sure you push them together when gluing so they tightly packed into place to hold your rings!
What I learned:
-You may not like the towel idea. I chose the washcloths because I loved the color and I swear these are the softest towels ever! Luckily Dollar Tree has a wide assortment of towels, clothes and blankets to choose from!
-5x7 was the perfect size! I can hold all of my rings, with plenty of room for more ;) and it looks great on my dresser!
-If I could do it over, I would cut off the edging on the towels. They didn't like being folded over and give it the messy-ish look in the pictures. Which I don't mind, it just took longer to deal with, and figured I'd mention to the blogsphere so they can get cleaner looking rolls in their own versions =)
-The pencils worked like a charm, the only non-preferable thing about them is they were slightly shorter than the width of the frame, which doesn't seem to affect how it holds the rings, but if you have something longer, or more pencils than I had on hand to cut the correct length I would try it!
Now, your turn! Can't wait to see your versions and suggestions! Have you made your own item for the $5 challenge? I'd love to see it, make sure you link it!
•project may be linked to a party, check the link tab to see which!•