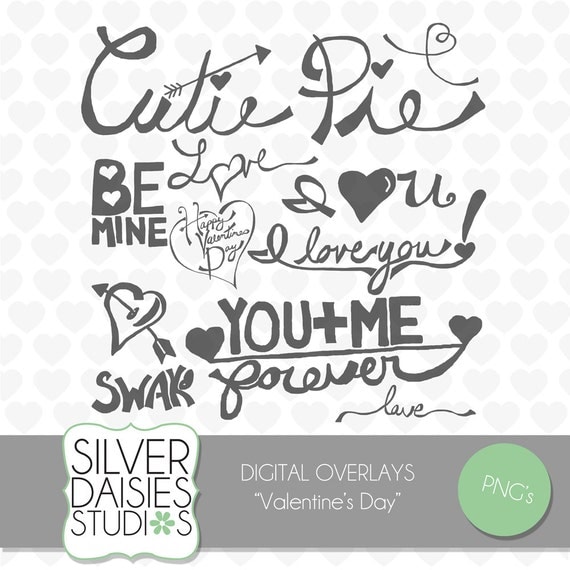
Recently I released a set of Valentine's Day Overlays in my Etsy Shop, immediately I received a message asking 'How do I use overlays'?? I pointed her to YouTube to find some great tutorials on overlays showcasing just HOW simple they are to use. But it got me thinking I should create a simple tutorial to show how anyone with photoshop can customize them!
*Disclaimer: when purchasing overlays check to make sure the seller allows customization of their product! Always respect the designers needs!*
*Disclaimer: when purchasing overlays check to make sure the seller allows customization of their product! Always respect the designers needs!*

Overlays are perfect for decorating just about anything. They are scrapbook 'rub ons' for the digital world! Place them over your cards to instantly customize them, decorate your scrapbook pages and album designs and use them on your marketing templates! Now again, you can find a great tutorial anywhere on the web, but I want to show you how to personalize them using Photoshop [my screenshots are from CS4, if you have a different version of CS, your PS layout may look a little different]!
My overlay sets come as individual PNG files as well as a layered PSD file. PNG's can be opened in lots of different programs, and have a transparent backgrounds so you can place them over items without having a colored background to block what's behind it. The PSD is created in CS4, it should be compatible with any CS [Creative Suite] version, however the PNG is the most important file because it can be opened by most programs and customized!
OPENING A PNG
You can open a PNG by simply going into Photoshop and clicking File->Open and clicking your chosen Overlay. This will bring up the file [mine are default black with transparent backgrounds]. If you would like to use the PNG on top of a template, card, album, or scrapbook page simply have your chosen aforementioned file open, click File->Place, and choose your favorite Overlay. This will place your PNG on top of your other layers. Once your file is open hit Layer->Smart Objects->Rasterize. This will convert the image into a vector file so you can edit it. [This is a basic tutorial, feel free to google 'rasterisation' to learn more of this process!]
SIZING THE OVERLAY
To change the size of your overlay, make sure the file is on a separate layer than the rest of your work. Select the layer, and click Edit->Transform and choose your transformation need [scale for size]. Now a box will pop up around your item, allowing you to play with the scale of it-there are 8 dots total in the corners and sides of the box. If you hover above a corner a two-sided curved arrow will appear- this allows you to move the item in a diagonal manner to place at a chosen angle.
Hover over the corner, and a two-sided arrow diagonal will appear, this allows you to directly resize the item. You can click and pull the corner to change, if you hold down the SHIFT button while resizing it will keep the ratio, while doing it without will let you play with the ratio. If you use a side dot to transform, it will not let you save the ratio!
CHANGING COLOR
If black doesn't work for your project, you change that! The easiest way to do this, is make sure your layer is selected, and click Layer->Layer Style->Cover Overlay. Here you can choose a color and even play with the opacity of the item! Make sure you have 'preview' turned on so you can see the changes as you make them to get it exactly how you want it! Blending modes offer unique ways to blend the item and color, I urge you to experiment with it! The opacity effects how much of the item is see-through, which works nicely to let it work into your project without 'sticking out' too much! Play-Play-Play! You can alter the opacity by clicking on the layer in your layer pallet and playing with the opacity slider on the top of the pallet as well!
CHANGING DESIGN ASPECTS
Now that you have the perfect size, color, and opacity, you can start playing with other design aspects of it. One popular one is shadowing! If you double click the image in your layer pallet, a layer style box will pop up [you can access this by going to Layer->Layer Style->Blending Options as well]. Here you have choices for shadows, and even embossing! Click Drop Shadow on the right side of the box, [make sure you have preview on again], and play with the opacity, distance and spread to get the perfect shadow for your item! You can even customize it more by playing with the angle! Go through all of the layer style options to customize your item exactly how you like it!
OVERLAY AS A CLIPPING MASK SHAPE
Clipping masks deserve their own tutorial, but lets keep it basic! A clipping mask allows you to take a shape [for example a square box], place an image over it, and then fit the image within the box! Some overlays are thicker than others, which can make for fun clipping mask shapes! To use one Simply open a new document, your preferred size [or use within an existing project], and place the overlay on a layer [see above instructions]. Place your chosen image [or pattern, texture, digital paper etc] on a new layer ABOVE the overlay. Click Layer->Create Clipping Mask. This is automatically place the image/pattern/paper inside the overlay. If it doesn't fit correctly you can change the size of the image using the transform instructions previously mentioned!
Now have fun and PLAY! Overlays are great for the finishing touch to any project! My overlays are made for personal use, and commercial IF its a flattened file! Enjoy! If you have a project with one my overlays feel free to post or link to it in the comments! Can't wait to see how it worked for you! Have any questions? Let me know!
*I don't own and have never used Photoshop Elements, I'm not sure if this process is similar or the same*
This post may be linked up to any of the link parties on Monday HERE.
*I don't own and have never used Photoshop Elements, I'm not sure if this process is similar or the same*
This post may be linked up to any of the link parties on Monday HERE.


