Wednesday, August 29, 2012

6 Benefits of choosing your favorite thrift stores


If choosing your favorite thrift store seems useless to you - read on! Here are my top 6 reasons for choosing your favorite store:
1. If you shop somewhere often, stay awhile, and usually spend money (doesn't have to be a lot), the owners will start to recognize you. When they recognize you they get chatty, splurge on days when donations are usually made, how often their biggest donators stop by, tell you way early when specials are on their way, occasionally give you a few dollars off if you're hesitant on a purchase, and even write your number down when you're looking for something specific! Do you need any more reasons??

2. Spending less time driving around, and more time shopping at once store will allow you to thoroughly search the racks for an amazing item. Usually the best stuff gets buried, so take your time, and if you know which shops have the hidden treasures-why bother going elsewhere? Not to mention, the less driving, the less money on gas you're wasting!

3. Spending a whole day thrifting sounds like a fun day, but its tiring and sometimes you end up buying things you don't really need or want, simply because of the thrill. Part of that thrill is walking into a store with no expectations and finding a fabulous deal-and when you only have 1 or 2 items, you feel more guilt about leaving the fabulous find behind. Which means that every time you walk into a new store, you have potential to fall victim to this feeling. Narrow down the number of shops you walk into, and it cuts down that potential. Now when you have a pile of goodies at one shop, you're more inclined to narrow it down, rather than splurge because its only a single item.

4. Many people set budgets, say $20 per store. If you are hitting up 10-15 shops, you have potential to spend $300! Budgets are a great idea for shopping, but if you stick to 5 or less stores in a day, you'll be sure to spend less than $100. Plus, going back to #3, when you have a pile of items at a shop, you're more likely to put some back before heading to the check out which means you'll be less inclined to over spend.

5. Let's face it, one of the benefits of thrifting in general is saving money. So when you choose your favorite shops, one thing you are sure to take into consideration is pricing. If there is a shop out of your price range, take it off your list- and you'll be sure to never overspend at that shop again!

6. Thrift stores tend to have a focus, such as clothes, or home decor. If you head out to accessorize your living room, choose your favorite shop that focuses on home decor. If you walk into a shop that has clothes, you will almost certainly get distracted by a cute top and buy items you didn't head out to shop for!

How I decide: I shop there a minimum of 3 times within 2-3 months. Go on random days, like a Monday, Thursday and a Saturday. That way you know if they don't have much inventory on Monday, it might the day before they accept donations or the day after a sale. If you go on Thursday and there's no inventory either, it might something to consider. If you go to a thrift store 3-5 times and come out empty handed each time -don't go back! If you find something once, there's potential, but if you find the prices too be too high, the stock to be too dirty, or the shop to be smelly, then don't bother! 

Do you choose favorite thrift stores? What are your guidelines and reasoning?
Photobucket

Tuesday, August 28, 2012

INSPIRATION shells

Unfortunately Summer is well on its way out, as a last ditch effort to bring the beach home with us, I decided to do an INSPIRATION using shells. Another fabulous (and FREE) nature item, that provides beautiful texture and color to anything, and welcomes summer all year round! 
INSPIRATION shells
FRAMES: These frames are so cute, and the perfect way to bring your summer vacation home with you all year! Grab a few of your favorite shells, along with a jar of sand and a shadow box frame or a frame without glass! First super glue your shells in the frame, make sure you are liberal with the glue and wait until they are properly adhered. Then slather on a thick amount of modpodge and pour the sand on, wait for it dry and shake off the excess. Once you have it ready (and no more sand falls off) hang on the wall, or sit up on a desk and remember your vacation forever!

FLIP FLIPS: I know, I know, once winter comes flip flops become a thing of the past. But if you wear them around the house, or just want a way to remember your summer vacation (in a functional way), these are perfect! Grab a couple shells, if they have a way to weave twine (or hemp or your favorite string) through, great! If they don't, use a drill bit made for ceramics to drill a small hole! Use the twine to weave or macrome the shells onto your cheap flip flips and whola! Cute, functional, and easy to change out if you feel so inclined!

LAMP: This lamp has so many possibilities! Grab your favorite shape from the thrift store, it can be traditional, or funky, or modern! As long as you like it, it's perfect! Then grab an assortment of shells (or all the same) and use hot glue or super glue to attach. Play with the placement, you can put as many or as little on as you like! When its all finished and dry, you can leave it natural to bring in those great colors, or spray paint your favorite color and leave the texture to speak for itself!

EARRINGS: My favorite accessory, I love earrings, and if I took a vacation to the beach, these would be my preferred way of saving the memento! Choose shells with natural holes, or use a drill bit made for ceramics to create a small one. Then attach a chain to your favorite earring backs (posts or hooks) and use 'O' rings to attach the shells to the chain! Custom, cute and colorful!

Have you tried one of these projects or techniques? I'd love to see it! Send me a link or picture so I can feature it on my blog!
To find out information about the products used, please click the image to head to Polyvore!
•This may be posted to any of the link parties

Photobucket

Friday, August 24, 2012

DIY PROJECT: Memo Board Part One: The Calendar

The long awaited DIY project -better be good right? Well here was my dilemma. I originally thought up this idea in response the the Dollar Store Craft Challenge (on the 1st of this month…). I needed something to organize all of my thoughts and office stuff so it seemed like the perfect opportunity. The problem was I was unsure how I wanted to do it-so I kept going back and forth, even after I purchased the supplies. Then something came up so I couldn't post it in time for the challenge anyway. Then I was lazy and a 3 hour project suddenly became a 3 week project. Finally my last issue was, I wasn't sure how to post it because ultimately I was doing 3 projects, and it may be long for one post. Long story short, I've finally decided to break it up over 3 posts. 
 Part 1: The Calendar 
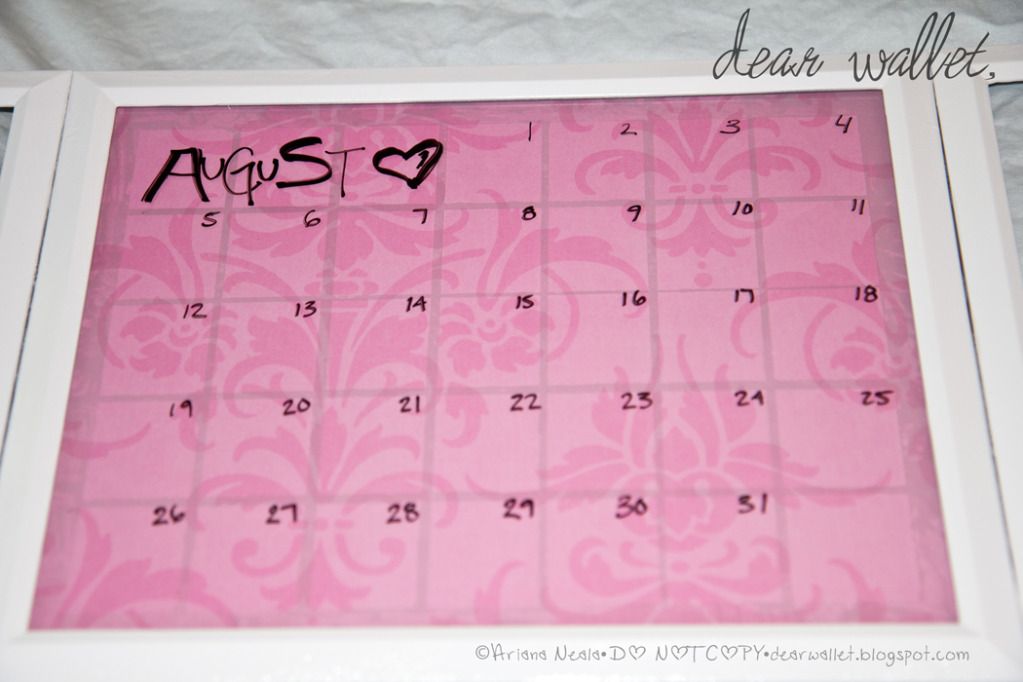
I needed a calendar desperately. Something big and easy to see that I didn't need to flip through pages in a book or a binder. So I could keep track of the generic things, like concerts and doctor appointments! This seemed like a no-brainer to me. 
Supplies: 
Frame-if you have one at home, use it! Mine was from the Dollar Store
  Spray Paint-I had extra on hand in white
  Scrapbook Paper-I had this on hand, but any paper, or wrapping paper you like will work
  Paint brush-a foam brush will work even better, you can get these at the Dollar Store
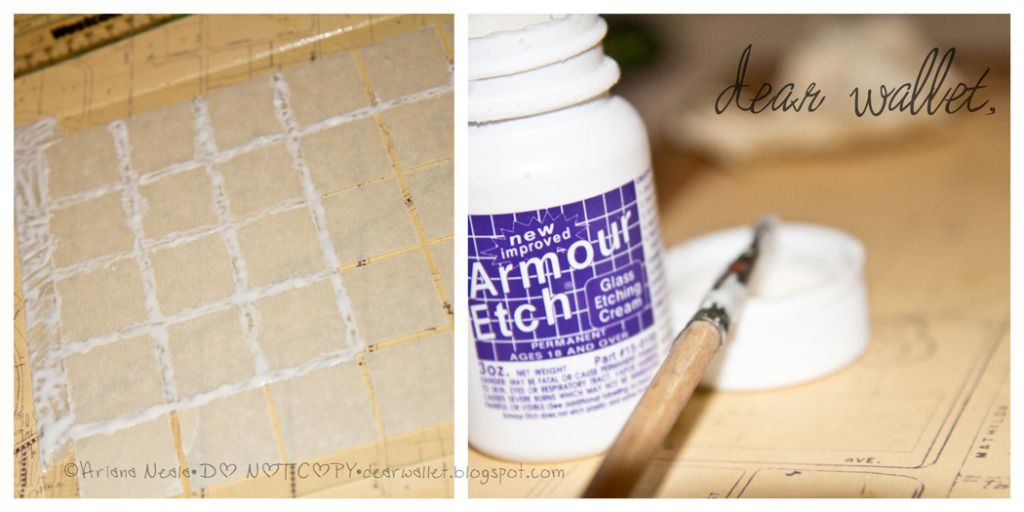
  Etching Solution-had this on hand as well.
 My cost: $1 

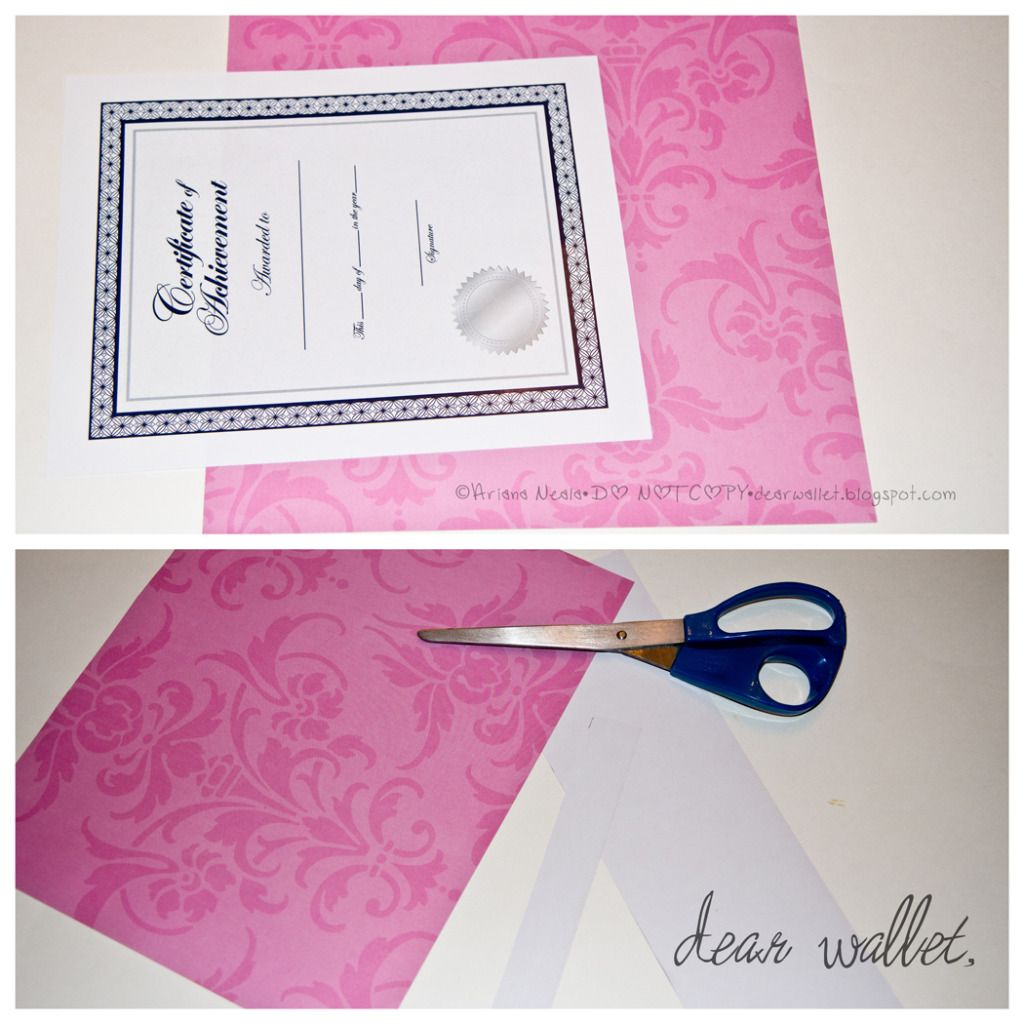
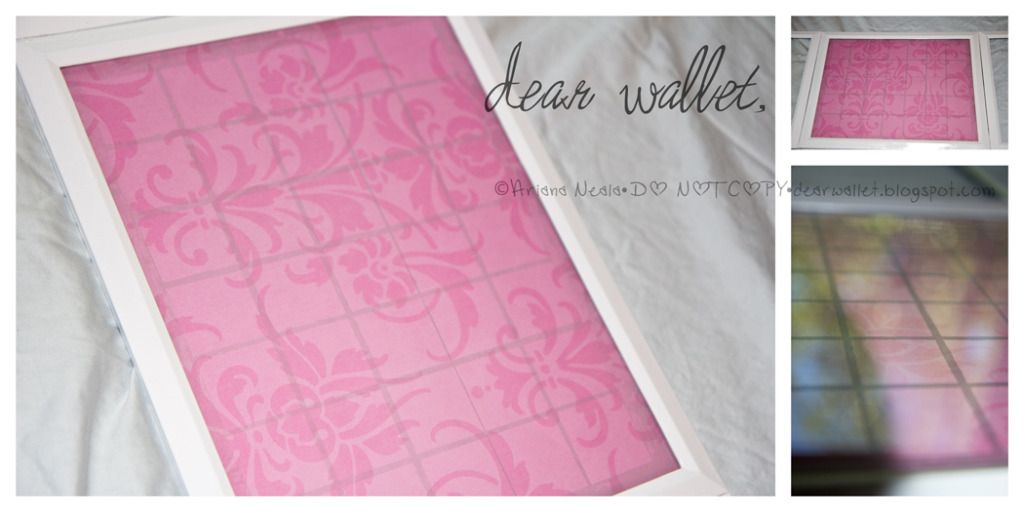
I started this project out by painting the frame, I used spray paint and it ended up using 3 coats-which I will explain later in my third post. I used the paper inside the frame to measure and cut my scrapbook paper to the size needed. Since my office is gray, pink and yellow-I chose a cute pink pattern, the pattern you use should not be bold or distracting, try subdued patterns (tone on tone) or plain colors. 
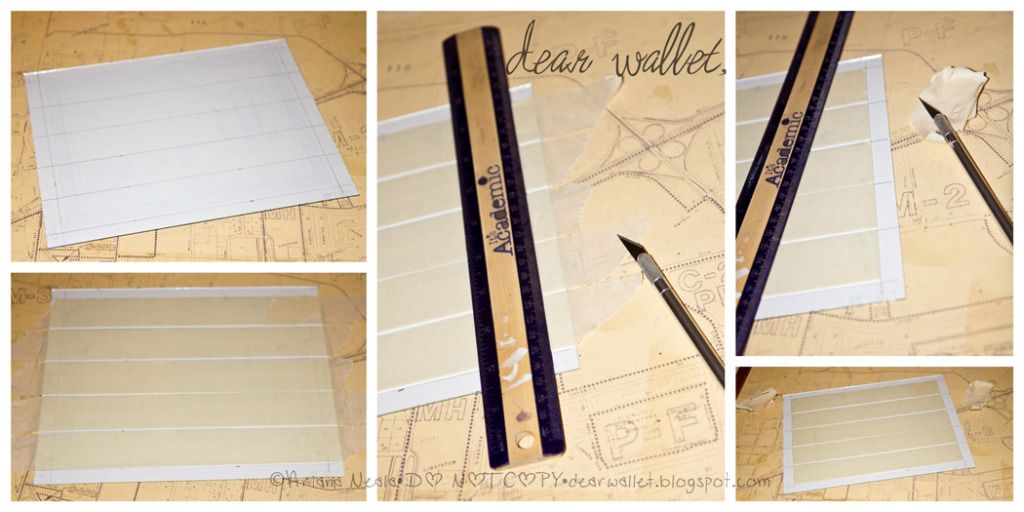
 Next I measured out lines on the back of the page from the frame to create the basis of the calendar on. I measured in half an inch from either side to create a border, then measured what was left and divided by 5 (for horizontal). Then I taped it to the back of the glass. Using masking tape (or whatever you have on hand) I placed the tape along the lines on the other side of the glass, leaving about an 1/8th of an inch between them. Using a ruler and exacto knife, I cut off the excess to create that border. 
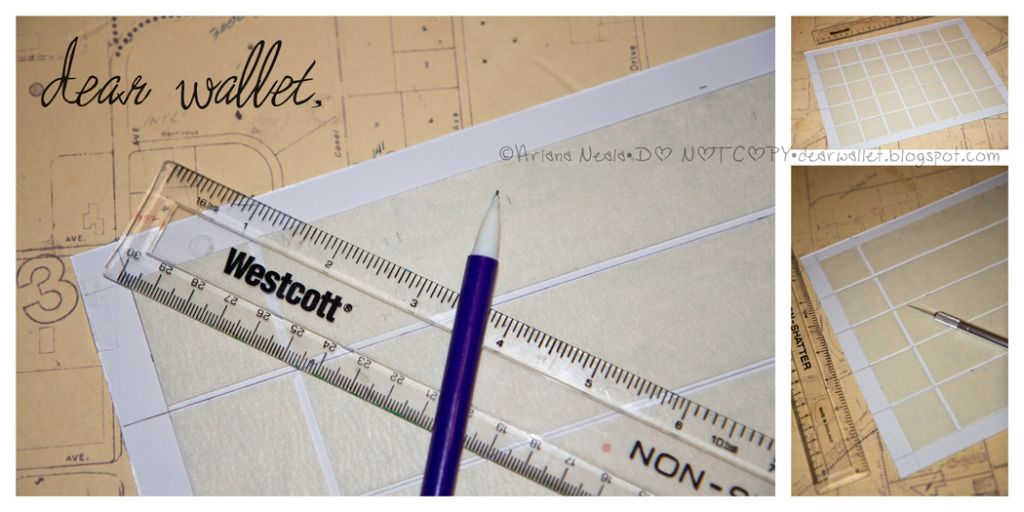
 Measuring again I made the same divisions going down, dividing by 7 (for vertical). I left about 1/8th of an inch again between the boxes, and use the ruler and exacto to cut evenly. 
 Once my calendar was created via tape, I opened the etch solution and began dabbing it on. A foam brush would have worked better to create even strokes and fill it faster. Make sure you apply quickly and liberally. As you can see I did not and mine wasn't as even in the end result. Wait about 5-10 minutes before washing off. 

 After it's dry replace in the frame, placing the paper behind it as a backdrop. You will have a perfect calendar border with a cute interchangeable background!
Now you can write on it with white board pens, and erase when you're done to change the dates every month! Plus, you can purchase the markers at the dollar Store!
Stay tuned next week, for the next part of my office organization!  
•This may be shared on any of the link parties page•

Photobucket

Thursday, August 23, 2012

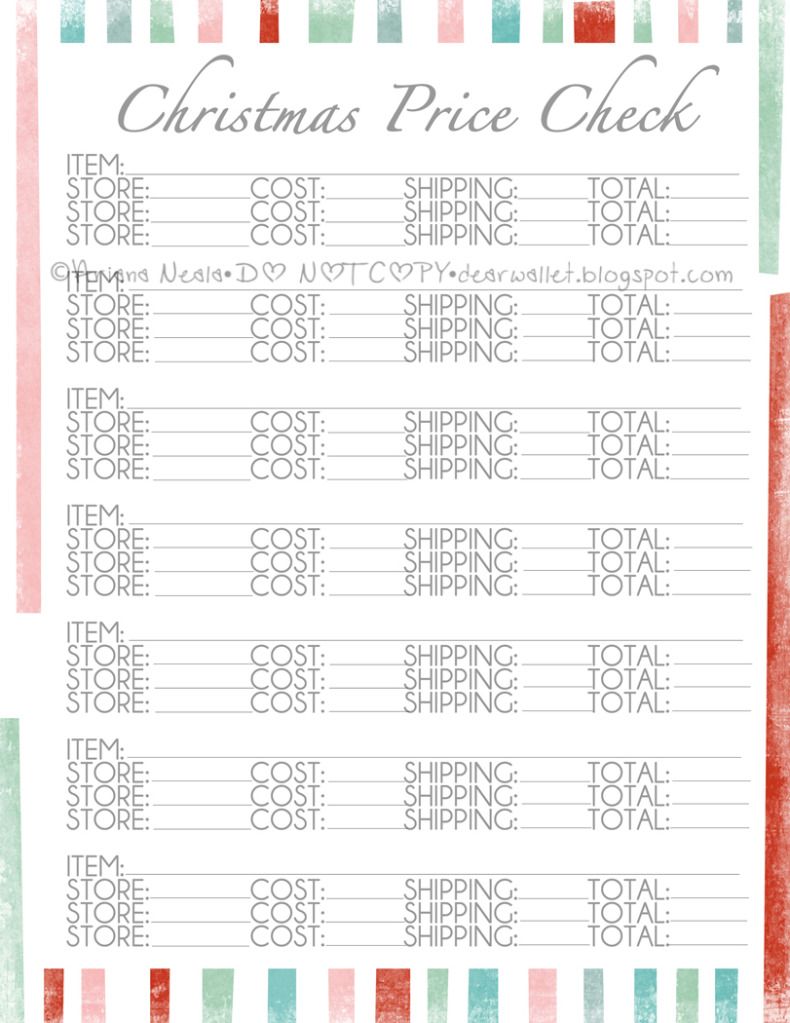
Christmas Price Check FREE Printable

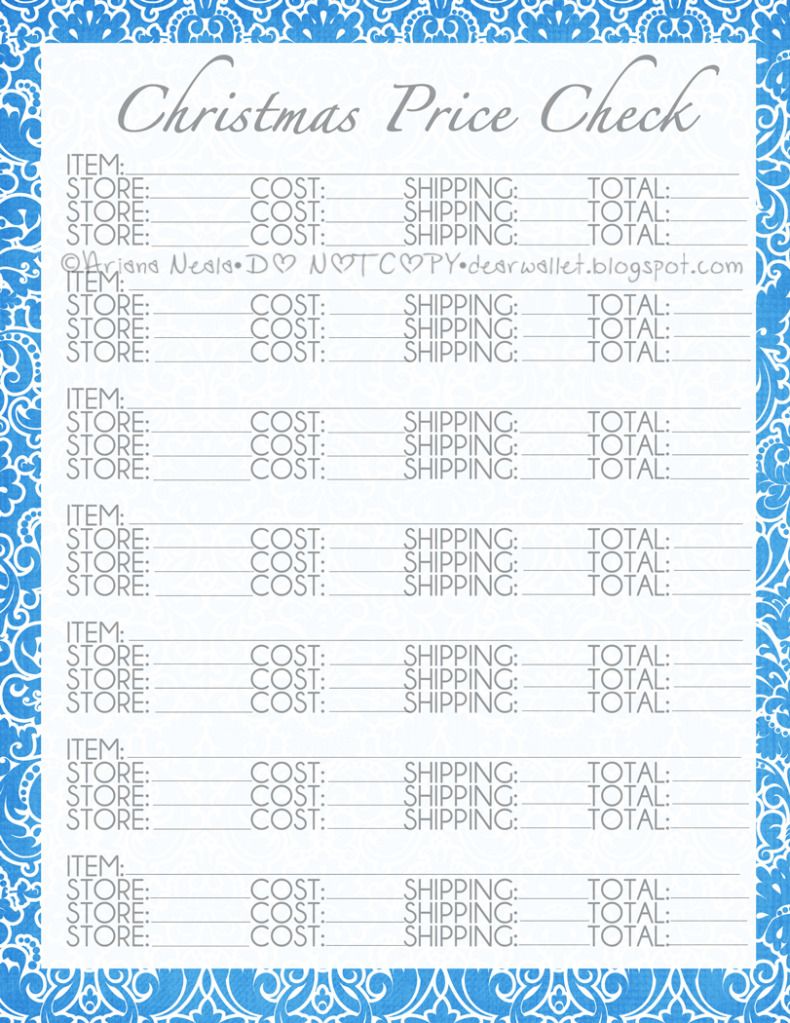
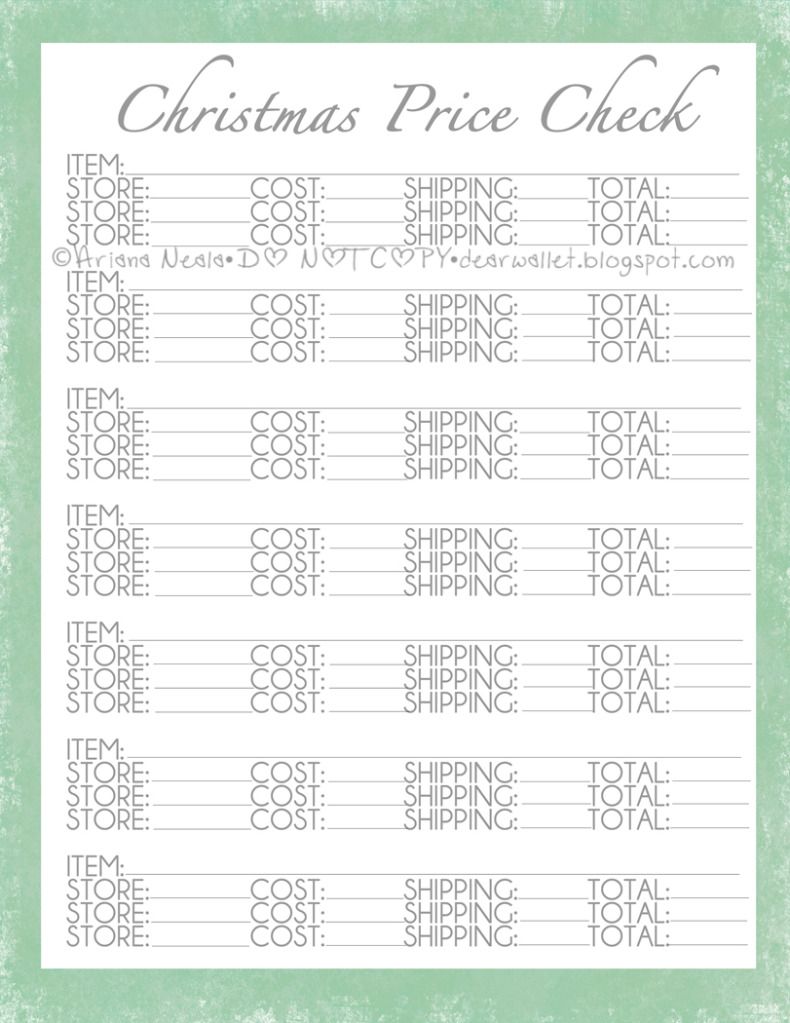
 Told you more Christmas Goodies were coming, and here's the next edition! Possibly my favorite-probably because I love lists AND saving money, so this is a double winner in my book! Once upon a time I was shopping online for a very expensive item, I found a place offering it a LOT cheaper than others, but the shipping was twice the amount as the other places. Thus I created this very sheet to help me tally the prices and therefore save money! I've turned it into a festive, but not too festive worksheet so you guys can keep track of your Christmas shopping prices, allowing you to shop around when you have time, and ensure you get the best price you can!


TIP: Make sure you look around for coupons every chance you get to help you save even more money! 

The worksheet is easy (and free as always!), once you've decided on a gift for someone simply fill it in the item spot. Then find 2-3 stores offering it, record the cost + shipping cost, and total it up. Once you've price checked around a few times (and looked for coupons to lower them even more)! Then choose the best spot for you to purchase from! Keep in mind shipping times as well. For example Amazon offers free shipping on certain items, but it takes a month to receive it. If you have an event you need the item for coming up, make sure you choose the shipping options that works best for you!  

Rules for the download: please, please, PLEASE make sure you subscribe to the blog by GFC, RSS, or bloglovin and share on Facebook or Pinterest to send your friends-Dear Wallet Printables are for followers only! Do not reproduce, or claim as your own, all rights belong to Silver Daisies Studios and Ariana Neala. Thanks so much, click the image to begin download! 
*//EDIT: I truly love that so many of you are loving these printables enough to download, but please take an extra second or two to follow! Thank you! =)

Blue Christmas
 

Jingle Bells
 
Sleigh Rides


•This may be shared on any of the link parties page•
**Background is freebie from Design House Digital**
Photobucket

Wednesday, August 22, 2012

Organizing my Vanity | Arm Candy Edition

**Before you guys get too concerned, I do have an article coming this week, I just messed around with the schedule of my posts to try something new! I also have a DIY project coming up-so stay tuned, and hit that follow button on the sidebar to stay up-to-date!**

I'm in the process of updating my vanity, now by vanity I mean my dresser top (obviously! ;)) because I have ZERO room for an actual vanity (someday...). You may remember my fun post for a Ring Display! Well now I will introduce my bangle display!
Here was my dilemma, I love bangles. I have many, and I tend to buy more and more every time I go thrifting (oops)! For a long time I stored them on long neck wine bottles (on top of my dresser). I also stored bouquets for my photography business in them as well. It worked because it kept them out of the way and they were nicely displayed. The problem was if I wanted to wear one near the bottom I would either have to (take out the bouquets) pour them all off, or skip it. I wanted needed something that was easier.
I spent some time on Pinterest, and google, sketching ideas, and finally decided that a bowl would be the easiest and cheapest route. I made plans for the potential bowl I was going to create (yes DIY)-and then I went thrifting. And found a bowl that only dreams are made of. Ok, maybe not. But I do love it, and when I saw it I had to have it!
I've done some research on it, and it is certainly quite common (especially on etsy). Frustratingly, there are varying facts on it-an 80's Canadian designer versus a 60's Italian designer. While I'd love to know who made it, I love it regardless. Plus-who can pass it up for $1.99!
It works perfect for my bangles, which by the way, after I took these pictures I found the other half of my collection. Turns out not only was it time consuming to take them off the wine bottles-but to put them back as well!
So how do you guys like it? What do you use to hold your bracelets?
•This may be posted to Wednesday of the link parties

Photobucket

Tuesday, August 21, 2012

INSPIRATION [twigs]

I love nature, twigs being my favorite part. Something about the texture, and the smells, and the flexibility. Or maybe its just because they are so perfectly imperfectly organic (um does that even make sense??). Regardless, a shot of color can bring a beautiful balance of all things cohesive and modern to a timeless (organic) piece like twigs. (Did you learn nothing from last week's INSPIRATION wild in white??)!
INSPIRATION twigs
TWIG PLATE: I love the beautiful texture this can bring to any room, bringing almost a rustic chic, or even flowing perfectly with a beachy theme. The original is made of sanded willow branches woven together. For your own imperfect version why not grab some local branches in your yard, and layer them to your liking! I suggest using the bottom (not the top) of a can (such as olives-or something larger) to create a base to grow off of. It gives just enough height to keep it from laying flat, and a small enough base to keep it from moving. Use superglue (or hot glue) to attach and finish it off with a coat of your favorite color spray paint!

EARRINGS: These are too cute and fun, not to do! Grab a couple small twigs and strip them of extra branches creating two long branches. The key to this project is finding branches the same length/width and still alive! Soak them in water if they are too dry for 12-24 hours before bending. To keep the shape glue together to create the circle, and let dry for 24 hours. I would also dip in a sealant (such as polyurethane) to keep it from getting too dry and brittle later. When its dry attach earrings hooks or posts, and paint with your favorite nail polish to give some color!

CANDLESTICKS: I'm not going to lie, I saw these on High Low Project, and fell in love so I had to share this idea! Sabrina Soto found large branches with some weight to them, and sanded to create a beautiful sculptural feel. She used a double edge screw in the top, tied to a string, then poured water and paint into a bin to drunk the branch to give it a watery silver look. Unfortunately this means you waste a lot of paint. So here's another suggestion for the same look. Instead of a double sided screw (to screw the candle on), if you find one thick enough, you can drill into it to create a hole to stick the candles into! Finish off with a coat of spray paint and perfection!

TWIG VOTIVE: Grab another can of olives and grab the bottom part again, then use those twigs to create a ring around the top of it, using hot glue (or superglue) to attach. I love how the original has movement to it, but attach to your preference! Place a votive inside and you have a beautiful centerpiece! You could even finish it off with your favorite spray paint for a truly personal look!

BOWL: Soak your twigs in water for 12-24 hours to get them nice and flexible. Turn a bowl over, cover with saran wrap, and begin playing with placement of the twigs. When you have your preference (use as many or as little as you like) begin hot gluing the pieces together. Try adding layers for dimension and added texture! I would add a bowl of the same size on top of it after the glue has dried, and keep it there for about 24 hours. Long enough for the twigs to dry and keep them down from popping out of place. When its done, you could seal it using polyurethane and finish off with a coat of spray paint!

Have you tried one of these projects or techniques? I'd love to see it! Send me a link or picture so I can feature it on my blog!
To find out information about the products used, please click the image to head to Polyvore!
•This may be posted to Tuesday-Wednesday of the link parties
Photobucket

Saturday, August 18, 2012

First Day of School FREEBIE Printable!

I was originally going to save this post for next week, but since so many have started school already, there is no need for me to hold it hostage! This is an oldie-but-goodie! I created this page originally for my clients (I'm a photographer) with kids, as something (free) and fun they could print out and put in a frame (8x10) and glue on their favorite school photo! Later, they could save the page to place in an album to keep! 

The best part is, your child can fill it out (or you can fill it out for them), so not only do you get to saver their precious childhood through a school photo-but their life, through their own words! The template hole for a photo is 4x6, but you can easily place a smaller image centered and have a cute border around it!

Rules for the download: please, please, PLEASE make sure you subscribe to the blog by GFC, RSS, or bloglovin and share on Facebook or Pinterest to send your friends-Dear Wallet Printables are for followers only! Do not reproduce, or claim as your own, all rights belong to Silver Daisies Studios and Ariana Neala. Thanks so much, click the image to begin download!

If you use it, be sure to take a picture of it in the frame all filled out, to share with me! I'd love to see your child's answers!
•This may be shared on Sunday-Wednesday link parties page•
**Background is freebie from Design House Digital**
*For those wondering, this is not a layered PS file, it is a PDF for the purpose of printing, and handwriting before placing in a frame!*

Related Posts Plugin for WordPress, Blogger...